Tuesday, 27 November 2012
Thoughts on Threadless, Life Choices, and Part Time Jobs.
Lately I have been introduced to this community of t shirt and apparel designers called threadless. Wait. That was months ago. The problem is, there is just too much work and study getting in the way before one can really pursue fame and fortune by doing things one likes.
I get these a lot. Questions about pursuing passion and dream. Honestly though, it has gone quite stale. If your calling is to be a Pikachu, don't get stuck becoming a generator maintenance guy repairing electric appliances when you can spark the buzz off out of yourself. Don't kill the child within you. It just isn't logical. Better fail fast and cheap than to have a sudden overdrive towards career-destroying mid-life crisis right?
Recently I got a job at a nearby cafe as a waiter/kitchen-hand/dessert-maker. It was always hell's busy and the staff are expected to run off and on the kitchen like a headless chicken til midnight. I always thought that working part time is going to be fun because I actually receive money out of what I do and not like doing some freelance stuff out of familial bonds. Turns out, working solely for the sake of money is tough, if not wrong. Maybe for the first few days you'll feel excited. But when you start to get used to it and the learning curve starts to get less steep, things can get very uninspiring and the flair will pretty much die down.
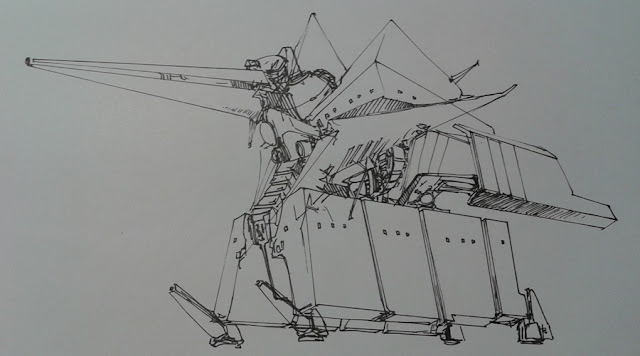
In any case, the drawing above is just a commentary of people who hasn't realized the potential within themselves. Come on guys. You don't need me to tell you that sometimes we try so very hard forcing ourselves to like things we don't have believe in. If you like art, make great art. If you like studying, climb the heights and be a professor. If you like cooking, get that Michelin Star. The point is, money should be the byproduct, not the catalyst. What you enjoy doing should be the reactants, and that's what I'm gonna do now. Submitting stuff to threadless!
Labels:
jobs,
life,
passion,
photoshop,
threadless,
traditional,
wacom
Thursday, 15 November 2012
TUTORIAL 1: SIMPLE MECHA COLORATION
One of the best way to draw awesome robots with sharp edges and cuboidal bodies is surprisingly through traditional method. Drawing straight lines with the brush tool and lasso tool in Photoshop is fine, but I personally prefer using pencil and ruler on paper because it gives me ease and the necessary speed in controlling the direction of the lines. Coloring it, however, is better and faster done using lasso tool and adjusting the hue and saturation. Here are the steps:
1. Draw the outlines on paper after the initial draft and make sure that the lines are neat and clean. I usually use thin 0.1 tip graphic pen for this. Scan it, and open the image in photoshop.
2. Using the polygonal lasso tool, carefully select out the area of the robot and press ctrl + shift + J to make a new layer via cut. Be diligent and don't use the magnetic lasso tool because it will leave crappy pixels around the edges and make your robot looks unpolished. In the layer containing the robot, adjust the level by pressing ctrl + L or command + L so it looks bright enough for coloration. (see below)
3. Select the background layer and press control (command if you are using apple) + delete to color it with white. Then adjust the brightness by pressing ctrl + u so that you get the light grey color. This is useful so that the overall color contrast will not be so high when we are painting the robot. For the robot layer, press ctrl + u (to change the hue, color, and saturation) and I chose orange for the base color. Then use burn tool to make some areas darker than the other. In this case, the source of light is at the top left hand corner above the tank so the bottom part of every element should be darker.
4. Copy the robot layer and erase some areas that you want to color differently. Use eraser or lasso tool. After this, change the color to make them complementary. I did have some trouble in figuring out a nice color combination so take your time for that.
5. I finally settled with a dull cyan for the full body and bright yellow for highlights. Add a bit more shadows here and there and you can even add a third layer for a grey area around the machines. Finally, adding a paint daubs filter will create the shiny highlights around the edges of the line, rendering a more refined machine look for your turret.
6. Add a little bit of dark areas for value play using the burn tool. You can even put a texture over some areas to make it look rusty but that will be in some other tutorial. Polish some tiny white spots on the highlight area (depending on what kind of material your turret is made of) and it will look even more convincing with great background. Simple mecha coloration: DONE.
Here are a few other artworks done using the same method as above.
INDONEXIA 4: FROM TRADITIONAL HOUSES TO POMPOKO
After my visit to Lake Toba back in July, I was really thrilled when I found out about the interesting stories behind traditional houses from the locals. The Jabu house, native to the Batak Clan is usually mounted with bull heads to indicate social status of the tribe. The house is viewed as sacred, carved with intaglio geckos to cast spirits away. The huge rooftops are also purposed for crops storage, ventilation, and a warm family gathering, all designed with the backwoods knowledge of the indigenous tribe. Unfortunately very few of these amazing architecture structures are left with deforestation and expansion of the city folks.
Around the same time, I was also watching Hayao Miyazaki's Pom Poko where a bunch of tanuki (Japanese Racoon dogs) tries to survive the vicissitudes of life when industrialization starts to kick in. It pains me to put myself in the tanuki's position, having to fight a greater force just to live and survive. And Miyazaki crafted this in such a creative manner, drawing inspiration from the ancient Japanese mythology of tanuki's transformation and summoning abilities. In any case, I feel that there's a shared universal feeling about the rustic village charm, an atmosphere no concrete can ever replicate. So I decided to give some twist to the traditional houses in Indonesia and give them a dose of character and modernity. Done in Photoshop CS4 and Wacom Intuos 4.
INDONEXIA 2: ANOTHER LANDSCAPE PERSPECTIVE
If you are looking for inspirations for concept art, check out Feng Zhu Design and his awesome, endless list of portfolio. I came across his artworks about March this year and it's a fantastic place to learn about color value, perspective, composition, and tips about working in the industry of entertainment design. I wanted to go for a one year program at his newly opened school in Singapore but too bad don't have the money for it. Still, his digital paintings and sketches are just so inspiring they suck me inside the moment I look at them. It's like a new realm, and it wasn't surprising, because he has been responsible for the concept art in Tron, Star Wars episode III, Transformers and many other great titles in the entertainment industry.
So I figured, why not apply and learn a thing or two from his comprehensive blog, and infuse some color into my boring hometown? The results are shown below, with a reimagined Lake Toba, a rocket-equipped rickshaw, and spirit concert from the Indonesian folklore. Done in Photoshop CS4 with Wacom Intuos 4
ZBRUSH CHARACTER DESIGNS
Came across this amazing 3D modeling software since December 2011 and has been loving it ever since. The Zsphere is terrific for creating the base skeleton for the model, allowing flexibility in sculpting it like a real clay. The starting point is a lump of spherical clay that you can literally pinch, nudge, and mallet into the desired shapes. Great for organic stuff but I find it hard to work with when it comes to creating a cuboid edgy look. Another problem is that when making the polymesh into 3D, the model becomes locked at the particular position and perspective. Besides that problem, it has been a great tool to aid me in studies of light and shadow. Highly recommended for those who wants to start out in 3D modeling!
Here are some of the works done using ZBrush and Photoshop.
INDONEXIA: WHY OUR HISTORY SHOULD BE REWRITTEN
Now if you have played Dynasty Warriors or Samurai Warriors or even the more awesome Orochi Warriors, you'll pretty much understand the intention behind these character designs. I know how boring hack-and-slash can get after all your characters learnt all the moves and reached level 100. But one thing that keeps me intrigued is the way how Konami manages to pull off a fresh modern look out of the ancient remnants of the east asian history. Seriously, I won't even look at if not because of the game. But now I know at least the surface story of the Three Dynasty, the Edo period, the feud between the shoguns in Japan, etc. etc.
So i figured, why not apply it to my own country? I've always dreaded history lessons in Indonesia where I am supposed to memorize dates of war A and war B and forget it the second I walk out of the exam hall. That's also probably why the patriotism level is so low in the country (unless you are an international student in some other country who is only proud of your country because of Indomie or how you survived under the corrupt government). If someday, somehow, we can simulate the toil of our past heroes and repackage Indonesian folklore into a more modern context, perhaps the younger generation can better appreciate the blood spilt by our forefathers and the richness of our tradition. Lofty dreams, some might say. But it is in these untouched areas where imagination sprouts the fastest!
Take a look at the few character designs below:
 |
| Barong |
 |
| Dancer |
 |
| Raksasha |
 |
| Shaman |
SO THAT'S ALL?
Unfortunately yes.
I know 4 pictures compared to the grand ambition is just grossly disproportionate. But that's why I need to meet people with the same vision to get more ideas and turn this into a reality. So if you have any suggestions whatsoever, leave me a comment here or email me at james.rotanson@yahoo.com. Your feedbacks will be most welcomed!
Wednesday, 14 November 2012
WELCOME TO THE ROTANATOR
Rotanator is my official blog to showcase my latest artworks and interest related to monsters, mechas, special effects, and various experimentation in the world of art. In here you will find concept art, character designs, graphic works, and some tips & tutorials on the know-how along the way. Feel free to browse through the galleries and constructive criticism is always welcomed!
Subscribe to:
Comments (Atom)


